Doll Making 101
The tools of the trade:
Sewing machine (obviously!) & sewing supplies (Quality thread, seam ripper, pins etc.)
Muslin
Fabric for dress, pantaloons, apron, slip etc....
Stuffing (and a pencil, chopstick, wooden spoon handle, dowel etc. help stuff)
Embroidery thread, yarn, wool etc. (for hair)
Doll making needle (I like the 5" ones-looks like a regular needle-just MUCH longer)
Buttons (for eyes or for decoration)
Barn Red paint or regular powder blush & a brush (for cheeks!)
Paint for shoes
Fine grain sand paper
OPTIONAL:
Kitty Litter, Poly Pellets etc. for weighting your dolls
Accessories-Flags, baskets, rusty keys, etc. to "customize" your doll
Candle Oil for scenting (see Recipe at end of article)
Turning Tubes or hemostats for turning
Tea or Coffee for stainingSOME THINGS TO REMEMBER:
*If you are not an experienced doll maker-buy some patterns! There are a TON of dollmakers out there who make easy to follow patterns that are chock full of diagrams and tips! This is a great way to learn shortcuts, to learn new techniques and to try different types of designs!
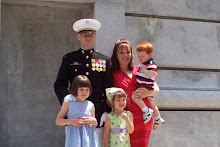
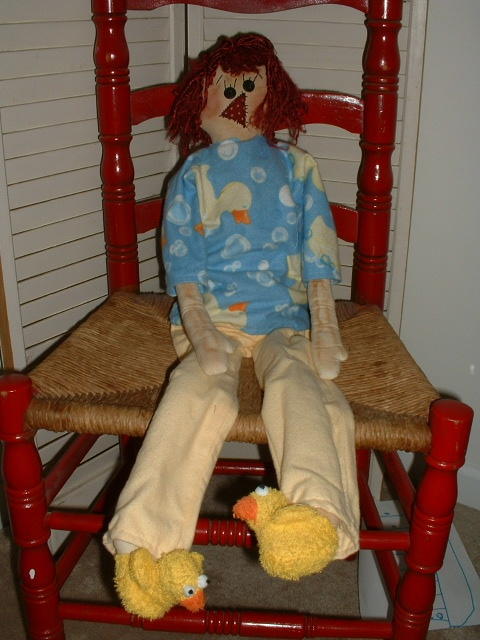
*Remember that you are just starting off...I am showing you a picture of my very first doll-no laughing now! 3 years later-I am designing my OWN dolls!

*Sewing dollies takes time-so TAKE YOUR TIME! I used to line my dolls up and make them assembly line fashion-suddenly the dolls started looking ALIKE! I wanted UNIQUE dolls so I started concentrating on doing one at a time!
*Some folks like their dolls to have a "theme"...Your fabric can inspire you-red, white & blue fabric for a patriotic doll, reproduction feed sacks for a mammy doll etc. Don't forget the accessories! A flag, a basket, an animal etc.
*When I first started out I used the cheapest Muslin that I could find-and that worked O.K.! Then I started trying different types and now I use the muslin that is already TeaStained. You can find this right next to the other muslin at Walmart or Joanns or other fabric stores. I use it because it has a tighter weave and doesn't unravel, tear or pucker as easily! It is the perfect shade for my ShabbyChic dolls but I can still stain it to make it even more prim and grubby!
*Here's a hint for epatterns...Print out the directions on regular paper but print out the pattern pieces on cardstock...Then you just have to cut them out and trace onto muslin!
*Every time that you trace a doll piece it gets BIGGER! I remember buying a doll made from one of my favorite designers and it was so much more petite than mine! But I was adding size by tracing around the original pattern pieces, then tracing that onto cardstock and then tracing the pieces onto the muslin! No wonder my doll looked like an amazon!
*You can use a variety of items for tracing your pieces-some use a mark-b-gone pen, colored pencils, carbon paper-I just use a regular No 2 pencil-slightly dull so it won't snag.
TEA OR COFFEE STAINING:
*Experiment to find the "recipe" that works for you. Remember that coffee will give a much darker look especially if you bake the doll in the oven. (Bake on the LOWEST setting for 10-15 minutes at a time-KEEP AN EYE ON THE DOLL or set the timer!)
*I usually stain a couple yards of muslin at a time but if you are going to stain your dolls individually make sure you do it before you put on the face or hair (the coffee or tea makes the hair stiff and will stain the color of the floss) and DO NOT put your doll in the oven if it has poly pellets or any other weighting material in it! Buttons may also melt in the oven!
PAINTING YOUR DOLLS:
You can use either black or brown (I like burnt umber) craft acrylic paints. You don't need to add a fabric medium to the paint. There is no need to paint the entire doll, as the clothes will cover much of it. Some folks do-some folks don't. Apply one to two coats, let dry and sand LIGHTLY using fine grain sandpaper.
ONTO THE DOLL MAKING...
*Lay your pattern pieces out on the muslin-arrange them so that you use the least amount of muslin but make sure you leave room around the pieces to cut! The traced lines will be your sew lines! Sew the pieces according to the directions-leaving open where indicated or on the fold. Some folks will double sew the neck for added stability to prevent against "blow-outs." Trim all seams to 1/4" or less-clipping your curves and corners. (you can also use pinking shears for this)
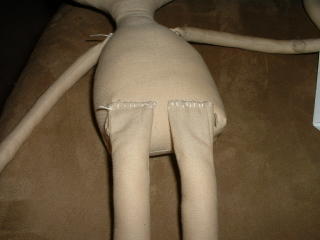
*Before you turn your body piece right side out, I recommend putting in a box seam to help your doll sit better. Match the bottom seam up with the side seam and sew across. Clip 1/4" from sew line.

*Turn all pieces right sides out-this is where the turning tubes or hemostats come in handy!
*Cut a slit through one layer of fabric on the body. If you are going to weight your doll pour in the poly pellets or use a snack size ziploc bag filled with kitty litter, sand, beans or whatever you use to weight your dolls. (The ziploc prevents moisture and bugs from invading your doll! Place stuffing around the bag and continue to stuff the body. Whipstitch the opening closed.


STUFFING
I like to use a wooden chopstick for stuffing my dolls...I spray the doll part lightly with warm water and use SMALL pieces of stuffing! Spraying with water will make the fabric shrink a bit and using small pieces of stuffing ensures smooth seams. Stuff only to where indicated on pattern. If your doll has a long narrow neck you can use a small dowel or chopstick to stabilize her neck. Push the chopstick up into her head and stuff around it. Make sure the chopstick extends into her chest.
*Once I have my pieces stuffed I like to paint the shoes before I attach the legs to the body. Follow the pattern diagrams. I let the paint dry and sand LIGHTLY with fine grain sandpaper. Some patterns have laces for the shoes-mark where the laces will go. I use 6 strands of embroidery floss or crochet thread.
THE FACE & HAIR
* I like to blush my doll's cheeks first-that way I won't get paint or blush all over the doll's nose and eyelashes. If you are using paint to blush the cheeks use a dry brush method. Put a small bit of paint on a paper plate and then dip a DRY stencil brush into it. Using a circular motion, dab it onto a paper towel until most of the paint is gone and it BARELY leaves a mark. Very lightly brush onto the doll's cheeks in a light back and forth motion. Remember, you can always add more but you can't take it off if you put on too much!
*I also like to do the face and hair before I attach the legs and arms. Following the pattern guidelines trace the face onto the muslin LIGHTLY. If you are using embroidery floss for the nose-use however many strands of floss the pattern indicates and your 5" doll needle. Tie a knot about 2" from the end of the floss and insert the needle in the back of the doll's neck (under the collar line) and come out at the bottom left corner of the nose. Take a stitch across the nose and back out the other side of the nose. Continue until you finish the nose and insert the needle back down THROUGH the head and out the back of the neck. Knot the threads and clip. If you are using embroidery thread for hair-this is a simple way of doing it. I like to use 6 strands. Take your needle from the front to the back on the head where indicated on pattern just below the seam, leaving a tail as long as you want the hair to be. Take the needle and go through the front of the head and back out the back, the same way you did the first time! Cut the thread the same length as the tail. Repeat until you have covered the head.

(I like to do the nose and hair before the face as it helps me to decide on the doll's expressions and size of the button's for eyes.) For the mouth, eyebrows, eyelashes and attaching the button eyes, I use one strand of black embroidery thread-tie a knot in the end like you did for the nose-enter from the back of the neck and come out on one side of the doll's smile. Backstitch the smile and on the last stitch go through the doll's head and out where one of the eyes will go. Attach the button and take the needle through the head to where the other eye will go. Attach that button coming out at the edge of the eyebrow. Take a stitch and come out where the other eyebrow begins and take a stitch. Going through the doll's head, come out where you'd like to have eyelashes. When you are finished with the eyelashes go through dollies head and out at the base of the neck. Tie off and clip. For dolls with big heads and/or long necks, I stitch HALF the mouth from the corner of the smile to the bottom. Then I do the eyes and eyebrows and lashes. I come down to the other outer corner of the mouth and stitch the last half of the smile and then back out the neck! It is a lot easier that way & you don't wind up scrunching the doll's head and neck trying to get that needle back out.
ATTACHING THE ARMS & LEGS
*To attach the arms and legs I fold the raw edge under 1/2" and whip stitch them onto the body where indicated. You don't have to fold under the raw edge-it is just the way I do it!

*Don't forget to sign your dolly! You can use a pigma pen (Found in the scrapbooking section) or a fine point sharpie. I sign my name, the doll's name and the date.
MAKING THE CLOTHES
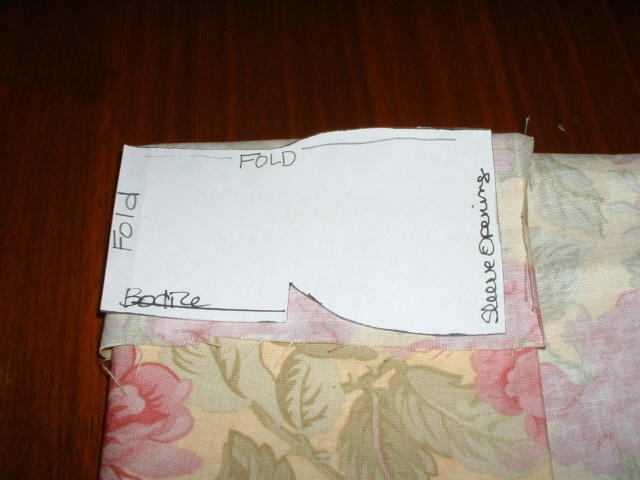
*Follow the pattern pieces for making the clothes making sure to follow any instructions for doubled material or laying pieces on the fold.

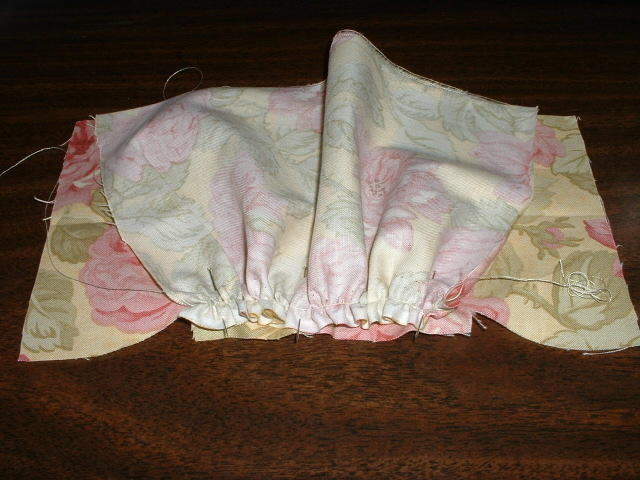
Cut or Tear the skirt piece of the dress and sew a gathering or a running stitch about 1/4" away from one long edge. Gather the skirt and with right sides together match it to the bottom of the bodice. Pin & sew right above the gathering stitch

Once you have both sides done remove the gathering stitch if you can see it.
With right sides together, match the underarm seams and edges of dress and sew the bottom of the arm and down the sides of the skirt on both sides. Sew across the shoulder seams leaving open where indicated on your pattern-or if you have cut on the fold-clip an opening for the head.
*I like to put the doll's dress on feet first-especially if the doll has a big head!
*Sew a gathering or a running stitch around the neckline and around the cuffs of the arms and legs (if indicated in the pattern)
MAKING THE LOONS
A lot of patterns will not give you an actual pattern piece for pantaloons or a slip (underskirt). They will simply tell you how long and tall the piece of material should be and most will have directions or diagrams for how they should be sewn.
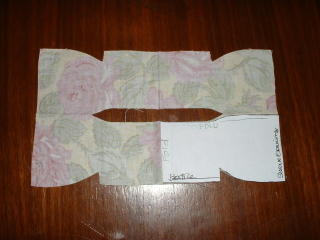
For loons cut a piece of material the length and width indicated in pattern.
Fold from left to right.
Sew the side about 1/4" from edge (green marking)

Move the seam to the middle
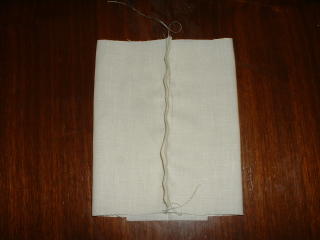
Sew up one side close to seam, across a few stitches and back down other side (Purple marking)

Clip between the stitching making sure to clip the corners

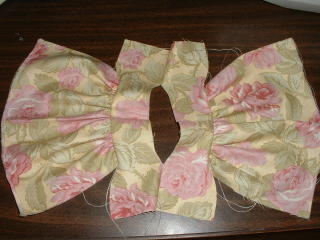
Turn loons right side out and sew a running/gathering stitch around waist (red thread)

Put them on your doll and cinch tight. You may want to tack the sides to the doll's body.
NOW JUST ADD ANY ACCESORIES YOU MAY HAVE AND YOU ARE DONE! CONGRATULATIONS!
 Recipe for Doll Perfume
VERY EASY!
1 oz candle oil
3 oz distilled water
Put in a spray bottle and SHAKE well before each application
I have sprays that I made 2 years ago that still smell as strong as the day I made them. The spray bottles I use come from Michael's and are 4 oz clear plastic bottles with a white sprayer. I lightly mist the dolls when I am done and also before I ship them. The scent that gets the most compliments is CinnaBun. I wouldn't recommend any floral scents. Remember-a little bit goes a LONG way!